Introduction
How to create a DIY product photography studio at home
Welcome, aspiring photographers and entrepreneurs, to the realm of product photography! In this modern age where visuals dominate every aspect of our lives, capturing high-quality images of your products has become more crucial than ever. Whether you’re an online seller, a small business owner, or a creative enthusiast looking to showcase your talent, investing time and effort into product photography is an absolute necessity.
The Importance of High-Quality Product Photography
Let me start by emphasizing how vital it is to understand the impact that high-quality product photography can have on your business or personal brand. Remember, in the vast digital landscape we inhabit today, potential customers often rely solely on images when making purchasing decisions. So put yourself in their shoes: would you be enticed by poorly lit and blurry photos?
No! Absolutely not!
You would pass right over them without a second thought. The truth is that compelling product images have the power to captivate viewers and arouse desire for what you offer.
They communicate professionalism, trustworthiness, and attention to detail. When done right, they create an emotional connection that drives sales.
Moreover, visually pleasing photographs go beyond immediate sales; they can establish your brand’s identity and cultivate customer loyalty over time. By consistently delivering exceptional product imagery that reflects your brand’s values and aesthetics, you position yourself as a reliable authority in your industry.
Benefits of Creating a DIY Product Photography Studio at Home
Let’s dive into some compelling reasons why this route may just be the game-changer for you:
- Cost-Effectiveness: Building a DIY studio can save you a significant amount of money in the long run.
Instead of hiring expensive professionals or constantly renting studio spaces, you have the freedom to allocate resources as you see fit.
- Flexibility and Convenience: With your very own studio, you have complete control over every aspect of the photoshoot.
No more scheduling conflicts or time constraints to deal with. You can experiment with different setups, lighting techniques, and angles at your own pace.
- Creative Autonomy: A DIY product photography studio allows you to be the mastermind behind every shot. You can tailor the aesthetic to align precisely with your brand’s identity, ensuring consistency across all visual elements.
- Rapid Iteration and Immediate Results: In-house product photography gives you instant access to your shots, allowing for quick adjustments and retakes if necessary. This eliminates delays in production timelines and accelerates your ability to showcase new products or updates.
So now that we understand why high-quality product photography is essential and how creating a DIY studio at home offers numerous benefits, it’s time to delve into the nitty-gritty details that will help bring our vision to life!
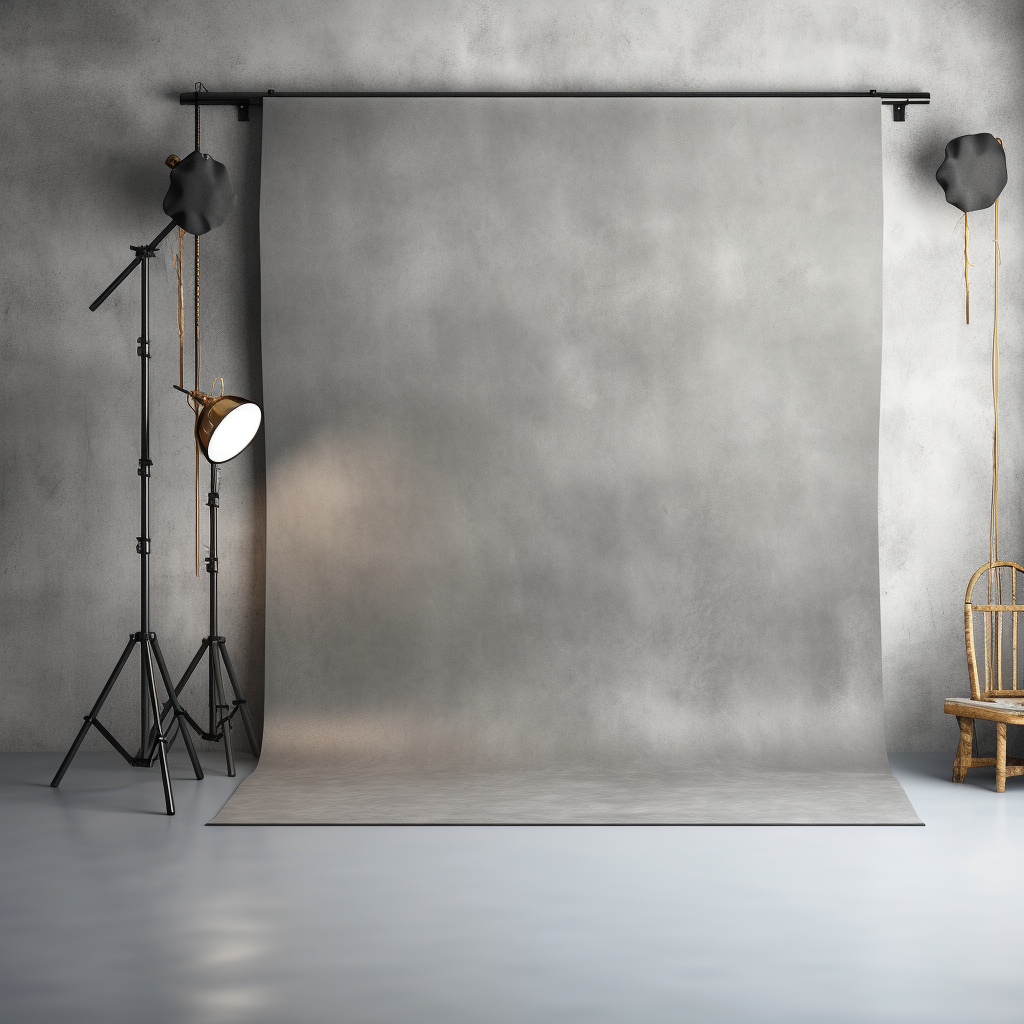
Setting the Stage: Choosing the Right Space
Selecting a suitable area in your home for the studio
Finding the right space within your humble abode to establish your DIY product photography studio is crucial. You need an area that offers enough room to set up your equipment, maneuver around, and showcase your products in all their glory.
Don’t even think about squeezing it into that cramped corner of your cluttered bedroom! Consider converting a spare room or even a section of your basement into this creative sanctuary.
The key is to have ample space dedicated solely to capturing stunning product images. Look for areas that are easily accessible but also offer privacy, as you don’t want nosy family members interrupting when you’re in the creative zone.
Considering natural light sources and their impact on your photos
Ah, natural light! The most exquisite way to illuminate your subjects and bring out their true essence.
When choosing a space for your DIY product photography studio, pay close attention to the natural light sources available. Windows are nature’s gift to photographers, so make sure you have access to one or more of them in this designated area.
Ideally, windows should be large and unobstructed by heavy curtains or blinds that hinder the flow of glorious daylight. North-facing windows are particularly favorable as they provide soft diffused light all day long without harsh shadows ruining your carefully composed shots.
Take note of how sunlight moves throughout the day in this area—the direction it comes from and whether any obstructions cast annoying shadows. Avoid spaces with glaring reflections from nearby buildings or busy streets outside the window; these distractions can turn an otherwise stunning shot into an eyesore.
As you bask in nature’s free lighting solution, consider investing in some simple tools like diffusers or reflectors to manipulate and soften sunlight when needed. This way, you can harness its power while still maintaining control over the mood and atmosphere of your product photography.
Finding the perfect space and optimizing natural light sources are crucial steps in establishing your DIY product photography studio. Now that you’ve secured a dedicated area, let’s move on to discussing the essential equipment you’ll need to bring your images to life.
Camera options: DSLR, mirrorless, or smartphone?
When it comes to choosing the right camera for your DIY product photography studio, there are several options to consider. The first choice that often arises is between a DSLR (Digital Single-Lens Reflex), a mirrorless camera, or simply relying on your trusty smartphone.
Let me break it down for you: DSLRs have long been the go-to choice for professional photographers due to their versatility and image quality.
With a wide range of interchangeable lenses and manual controls, DSLRs offer unparalleled flexibility in capturing product shots. However, they can be bulky and expensive, not to mention the steep learning curve involved in mastering their intricacies.
On the other hand, mirrorless cameras have gained popularity in recent years for their compact size and advanced technology. They offer similar image quality as DSLRs but without the bulkiness.
Mirrorless cameras are an excellent middle ground between DSLRs and smartphones, providing manual controls while being more user-friendly than their larger counterparts. Now let’s talk about smartphones – those little devices we carry everywhere with us.
While they may not compare to dedicated cameras in terms of pure image quality or control options, today’s smartphones boast impressive capabilities when it comes to photography. Most modern smartphones feature high-resolution sensors and multiple lenses that can capture stunning product shots with proper lighting techniques.
Pros and cons of each option
The pros of using a DSLR include its ability to capture images with exceptional detail and dynamic range. It allows you full control over settings such as aperture, shutter speed, and ISO sensitivity – essential elements for achieving professional-looking product photographs.
However, the downside is that investing in a DSLR can be quite costly. Mirrorless cameras offer comparable image quality to DSLRs with added benefits such as built-in electronic viewfinders (EVF) that give you a real-time preview of your shot.
They are also lighter and more compact, making them ideal for on-the-go product photography. Nevertheless, the mirrorless camera market is still evolving, and lens options may be more limited compared to DSLRs.
Smartphones, while not as powerful as dedicated cameras, have their own advantages. The convenience of always having a capable camera in your pocket cannot be overlooked.
Moreover, smartphone cameras are constantly improving with each new model release. They often come equipped with advanced features like portrait mode and low-light capabilities that can produce remarkable results without the need for additional equipment.
Tips for maximizing smartphone camera capabilities
If you decide to rely on your smartphone for product photography (and there’s no shame in that), here are some tips to help you make the most of its capabilities: 1. Clean your lens: Sounds basic, but don’t forget to wipe off any smudges or fingerprints from your smartphone’s camera lens before shooting. A clean lens ensures clear and crisp images.
2. Use natural light: Smartphones generally perform better in well-lit conditions, so try to take advantage of natural lighting whenever possible. Position your products near a window or shoot outdoors during golden hours (early morning or late afternoon) when the light is soft and flattering.
3. Experiment with apps: There are numerous photography apps available that can enhance your smartphone’s camera capabilities. Look for apps that provide manual controls like ISO and exposure settings, as well as those offering post-processing tools for editing and fine-tuning your product shots.
4. Invest in accessories: While smartphones offer convenience, they can benefit from additional tools to elevate their performance further. Tripods or mini stands designed specifically for smartphones can help stabilize shots and allow for consistent framing without hand tremors.
Tripods and stabilizers: ensuring steady shots
Now let’s talk about tripods and stabilizers – those often underestimated heroes of product photography. These devices are essential for achieving sharp, blur-free images and maintaining consistent framing. Here’s a breakdown of different tripod options and some budget-friendly alternatives:
Different types of tripods and their uses
1. Traditional Tripods: These are the most common tripods used in product photography. They consist of three extendable legs with adjustable height and various locking mechanisms to secure your camera or smartphone in place.
Traditional tripods offer stability and versatility, making them suitable for almost any type of product shoot. 2. Tabletop Tripods: As the name suggests, these compact tripods are designed to be placed on a table or any flat surface close to your shooting area.
They are lightweight and portable, offering stability for smaller products or when working with limited space. 3. Flexible Tripods: These unique tripods feature bendable legs that can be wrapped around objects such as tree branches, poles, or even fences.
They offer flexibility in positioning your camera at unconventional angles or locations. 4. Miniature Tripods: Extremely compact and lightweight, miniature tripods are easy to carry around and perfect for smartphone photography on the go.
DIY stabilizer alternatives on a budget
If you’re on a tight budget but still want to stabilize your shots without investing in a tripod, here are some DIY alternatives: 1) Beanbag Stabilizer: Fill a small bag with rice or beans (make sure it’s not too heavy), then rest your camera or smartphone on top when shooting from a flat surface. 2) Handmade Stabilizer Rig: Attach some weights (like water bottles) to both ends of a strong string or rope, creating counterbalance points when you hold it while shooting handheld.
Remember that stabilization is crucial for capturing sharp images free from blurring caused by hand movements. Experiment with these options until you find what works best for your specific product photography needs.
Lighting Techniques to Enhance Your Product Shots
Natural Lighting Setups: Harnessing the Power of Window Light
Ah, natural lighting, the holy grail of product photography. There’s something truly magical about the soft, diffused light that streams through a window and caresses your carefully crafted products.
It brings out their true colors and textures in ways artificial lighting can only dream of. So how do you harness this powerful force?
Well, my fellow artisans, it all starts with a couple of handy tools: diffusers and reflectors. Let me tell you, these tools are like the secret weapons in a photographer’s arsenal.
Diffusers are like the knights in shining armor that soften harsh sunlight or overpowering indoor light. They transform those unruly rays into gentle beams that delicately kiss your products with just the right amount of illumination.
Reflectors, on the other hand, act as loyal squires bouncing off light from all directions to fill in shadows and add depth to your compositions. But my dear artisans, remember that timing is everything!
The position of the sun changes throughout the day and affects not only the intensity but also the direction of light streaming through your window kingdom. Experiment with different angles by moving yourself or even shifting your products until you find that sweet spot where every detail is gloriously illuminated.
Shooting Outdoors: Making the Most of Natural Environments
Now let’s talk about taking your products out for an adventure in nature’s own playground! Shooting outdoors offers endless possibilities for creating captivating images that will make your audience swoon.
But beware! Nature can be a fickle mistress – one moment she showers you with gentle breezes and dappled sunlight, while another she challenges you with harsh sunbeams or pesky shadows.
Composing your products amidst natural backdrops can be a stroke of genius. Imagine your handmade ceramics nestled on a rustic wooden table in a sun-dappled garden, or your vibrant textiles draped over branches in a lush forest.
Nature provides the perfect stage for your artistry to shine. However, remember that Mother Nature has a mind of her own.
Harsh sunlight can cast unflattering shadows and wash out colors, while the interplay of light and shade under leafy trees can create frustratingly inconsistent lighting conditions. But fret not, my fellow photographers!
Embrace these challenges as opportunities for creativity. Experiment with different angles, adjust your exposure settings, or even bring along portable reflectors to tame the unruly light.
Artificial Lighting Options for Professional-Looking Results
Continuous lighting: Choosing between LED panels, softboxes, or ring lights
Subtitle: Shedding Light on the Right Tool for the Job Let’s face it, my fellow photography enthusiasts, the right lighting can make or break your product shots. When it comes to continuous lighting options, you’re bombarded with a multitude of choices – LED panels, softboxes, and ring lights galore.
It’s like stepping into a maze of confusion! But fear not, for I am here to guide you through this treacherous territory.
LED panels have gained immense popularity in recent years. With their impressive versatility and energy efficiency, they are a reliable choice for many photographers.
However, don’t believe the hype that all LED panels are created equal. Look for ones that provide a high color rendering index (CRI) to ensure accurate color reproduction.
Remember, vibrant hues sell! Softboxes, on the other hand, offer a softer and more diffused light compared to LED panels.
They create beautiful shadows and highlights with gentle transitions – perfect for showcasing textures and details in your products. Ditch those harsh shadows caused by direct flash or uncontrolled sunlight; embrace the elegance of softbox lighting!
But beware – assembling these contraptions can be as frustrating as solving a Rubik’s Cube blindfolded. Ah yes, ring lights… The beloved accessory of beauty influencers across YouTube and Instagram!
While they excel at creating an evenly illuminated shot with few shadows (ideal for portraits), they may not be your best bet when it comes to product photography. Ring lights tend to produce flat lighting that lacks dimensionality; your products might end up looking as lifeless as an abandoned mine shaft.
Now that we’ve illuminated our options (pun intended), it’s time to move on to another crucial aspect of artificial lighting: color temperature. Stay tuned to unravel the mysteries of this critical factor, my curious comrades!
a) Understanding color temperature and its impact on your images
Subtitle: The Warmth of Color, the Coolness of Ambience Color temperature, dear readers, is the secret ingredient that sets the mood and tone of your product photographs. It’s like choosing a filter for your images before they even exist!
But what is this mystical concept? In simple terms, color temperature refers to how warm or cool the light appears in an image.
Measured in Kelvin (K), lower values (around 2000-4000K) produce warmer tones resembling candlelight or golden hour sunsets. Conversely, higher values (around 5000-7000K) create cooler tones reminiscent of a cloudy day or fluorescent lighting.
Understanding color temperature is crucial because it affects the perception of your products. For instance, if you’re selling cozy blankets and want to evoke a sense of warmth and comfort, opt for lower color temperatures to create that inviting ambiance.
On the other hand, if you’re selling sleek and modern gadgets that scream sophistication, cooler tones might be more appropriate. Don’t let poor lighting sabotage your meticulous product styling!
Experiment with different color temperatures to find the perfect match for each item in your arsenal. Remember, my fellow artists: manipulating color temperature isn’t just science; it’s an art that can elevate your product photography from mundane to magnificent!
b) Positioning lights for desired effects (e.g., three-point lighting)
Subtitle: From Shadows to Spotlight – Mastering Your Light Symphony Dear photographers-in-training, let me introduce you to one of the foundational principles of lighting: three-point lighting!
While it may sound like something straight out of a mathematical nightmare, fear not – it’s simpler than deciphering algebraic equations. Three-point lighting involves strategically positioning three sources of light to create a harmonious balance of illumination and shadow.
The key light, as the name suggests, is your primary source that provides the main illumination on your subject. It’s the star of your show, casting captivating highlights and defining shapes.
But what about those pesky shadows that seem to lurk in every corner? Enter the fill light!
This gentle companion comes to the rescue by softening those harsh shadows cast by the key light. It ensures that no detail is lost in a sea of darkness, bathing your product in an even glow that sets it apart from its competitors.
And lastly, let’s not forget about our unsung hero: the backlight (or rim light). Positioned behind your subject, it adds depth and dimensionality by creating a luminous halo or outline around its edges.
This divine touch separates your product from its background, making it pop like a shooting star against a night sky. Remember my friends, lighting is an art form.
Positioning each light source with intention and care can transform an ordinary product into something extraordinary. So embrace three-point lighting and compose symphonies of illumination; let your products bask in their well-deserved limelight!
Flash photography: Understanding different flash types (on-camera vs off-camera)
Subtitle: Flash Frenzy – Unleashing Your Inner Light Ninja Ah, flash photography – a realm shrouded in mystery like ancient legends waiting to be discovered.
But worry not; I’m here to unravel its secrets and help you wield this powerful tool with finesse! On-camera flash may be convenient when capturing quick moments or snapshots at family gatherings or social events.
However, when it comes to professional-grade product photography, relying solely on this little beast perched atop our cameras might lead us down a treacherous path paved with unflattering shadows and washed-out details. That’s where off-camera flash swoops in to save the day!
By freeing your flash from the confines of your camera, you gain control over the direction and intensity of light. This newfound freedom allows you to sculpt the lighting precisely as you desire, creating captivating and dynamic product photographs that demand attention.
But remember, aspiring light warriors, with great power comes great responsibility. Taming off-camera flash requires an understanding of light modifiers such as umbrellas, softboxes, or gels to shape and colorize your illumination.
Experiment with different techniques like bounce flash to produce softer light or gels to infuse your images with vivid hues. Embrace the full potential of flash photography; banish those dimly lit corners and bring forth a radiance that highlights every intricate detail of your products.
Unleash your inner light ninja and conquer the shadows that dare cross your path! My dear readers, artificial lighting options are vast and varied – each with its own unique strengths and weaknesses.
Choose wisely, considering factors like versatility, quality, and impact on color temperature. Position each source thoughtfully for desired effects using techniques like three-point lighting.
And when it comes to flash photography – be bold! Embrace off-camera flash for ultimate control over illumination while experimenting with different modifiers and techniques.
Remember: photography is an art form that requires patience, practice, and a deep understanding of light’s transformative power. With determination in our hearts and cameras in hand let us embark on this journey toward masterful product photography!
Creating
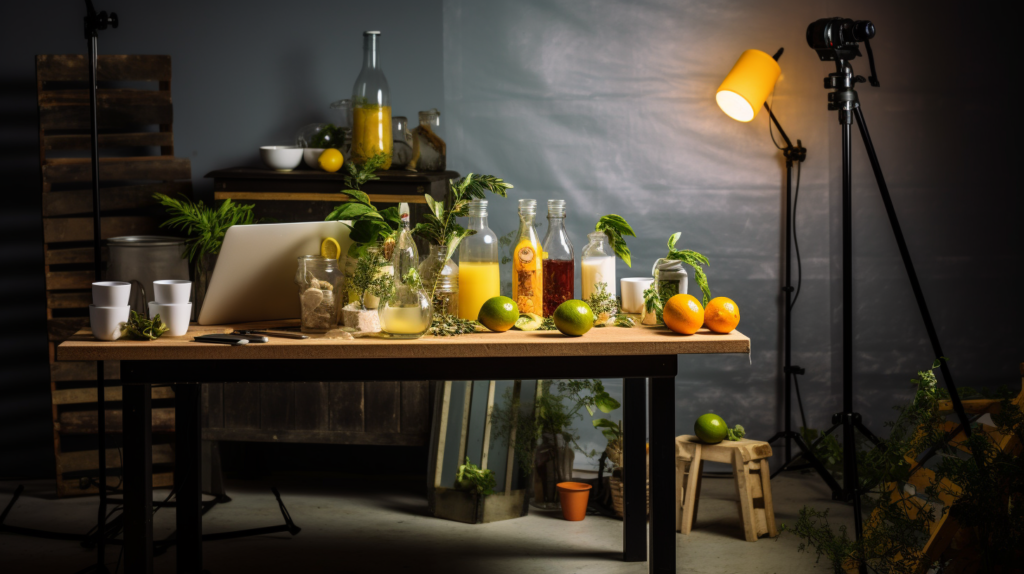
1. Styling your ProductsNow that you have set up your DIY product photography studio, it’s time to unleash your creativity and style your products for stunning shots. Remember, the goal is to make your products stand out and entice potential customers. Start by considering the mood or theme you want to convey. Is it a minimalistic look with clean lines, or perhaps a rustic feel with props like wooden backgrounds and vintage accessories? Experiment with different compositions, angles, and arrangements until you find what truly captures the essence of your product. When styling, pay attention to the small details that can make a significant impact on the overall appeal of your photos. Use props strategically to enhance your product’s story without overpowering it. For example, if you’re photographing jewelry, consider using a beautiful velvet tray or delicate flowers as accents. Be mindful of color coordination and ensure that all elements work harmoniously together.
2. Post-Processing MagicWhile capturing great images in-camera is essential, post-processing can take them to a whole new level of professionalism. Even if you’re not an expert in editing software, there are simple yet powerful tools available that can help enhance colors, correct exposure levels, and remove any minor imperfections. Start by importing your photos into editing software such as Adobe Lightroom or Photoshop. Adjust the exposure settings if needed and experiment with contrast and saturation levels until you achieve the desired look for each image. Don’t be afraid to play around with different filters or presets; they can add unique touches that suit your brand aesthetic. Remember not to go overboard with editing! The goal is not to create unrealistic images but rather to showcase products accurately while enhancing their visual appeal.
Conclusion
Creating a DIY product photography studio at home allows you complete control over capturing high-quality images that will elevate your products and boost your business. With the right space, equipment, lighting techniques, and styling skills, you can achieve professional-looking results without breaking the bank. By understanding the importance of natural light and using it to your advantage, you can create stunning product shots with a captivating ambiance.
Additionally, exploring artificial lighting options opens up new creative possibilities and ensures consistency in your photographs. Remember that product photography is an art form – it requires practice, experimentation, and a keen eye for detail.
While the technical aspects are important, don’t forget to inject your unique style and personality into each image. Embrace creativity during the styling process and use post-processing as a tool to refine your photographs.
With dedication and perseverance, you’ll be able to capture visually enticing images that do justice to your products. So go ahead, set up that DIY product photography studio at home—your success awaits!